Turning a small lino print into a seamless pattern and fabrics was a an interesting project with many steps. I started with a 10cm x 15cm lino print I made in 2019, never imagining that one day I would be wearing it. Here’s how I took “The Goblins” from paper to textile, along with the challenges and lessons I learned along the way.
The Original Artwork
I carved “The Goblins” when I was testing my new portable printing press that I’d bought as a graduation gift to myself. The design wasn’t planned—it emerged as I worked, and the playful, goblin-like faces that seemed to stare back at me gave the print its name.
I scanned it and used it as a single image on my Redbubble store products. Back then, I did not know how to do seamless patterns, and I was just happy to have the single image. When I started creating seamless patterns in 2024 and ‘The Goblins’ jumped to my mind, and I started playing with it.
Creating the Seamless Pattern Blocks
I had scanned the print at the highest resolution possible my printer/scanner could manage, and it was more than enough for the pattern development.
I opened the scan in Photoshop and began the process of turning it into a seamless pattern.
- Doubling the Canvas: I doubled the width and height of the image to create space for the pattern repeats.
- Flipping and Arranging: I placed the original scan in the top-left corner, then copied and flipped it vertically to place next to the original. I selected both copied and flipped them horizontally, placing the new copies below the first two. This created a mirrored, seamless effect.
The result was a massive file—2.8GB at 42cm x 59cm and 755 pixels per inch. My computer struggled to handle it, so I had to reduce the resolution to 300 PPI to make it manageable and still good enough for very large prints. I kept the original too, just in case I someday get to show it off in a billboard 😉
After I had a manageable file size, I had to separate the colour for colorization of the patterns. This pattern had just two colours, so I created a mask from the white areas and then created a copy that I inverted. That way I got a very clear lines between the colours and can use both in creating colour variations.
The original pattern block is rectangular which is ok for many of the POD-sites, but some platforms require square blocks. So, I created two square patterns from the original pattern block’s middle and the end. The square pattern block’s height is the same as the original pattern width. I also made masks for these and realised I had a lot more options as I could mix the centre and end masks to create completely new patterns and even more colourways.
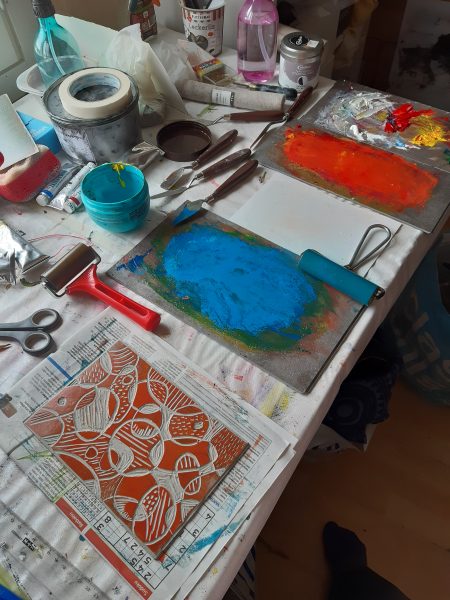
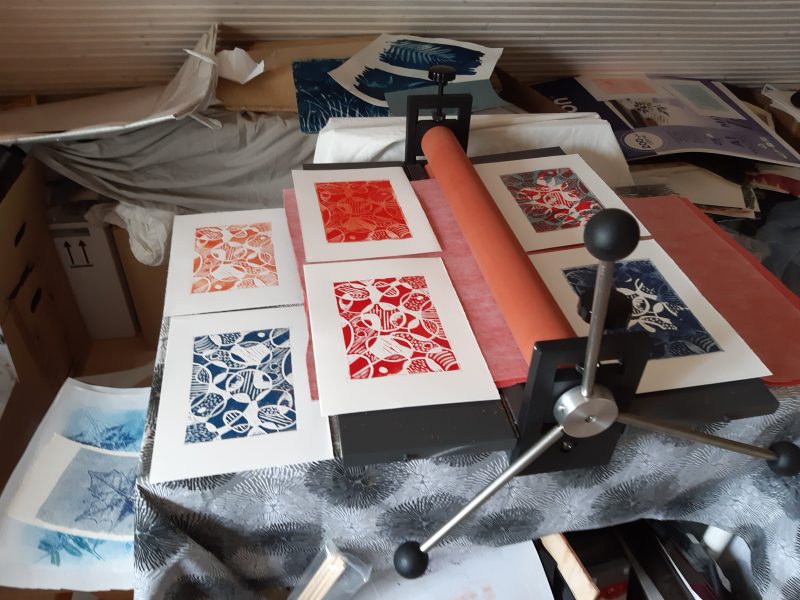
After I had the block masks, it was time to create the colorways.
I created two photoshop files, one for rectangular and another for square blocks. I added the masks to them and played with different colours and created coloured pattern blocks.


")


Ordering Fabric with the Goblins Pattern
I wanted to see how the Goblins pattern works with actual garments. I could have bought them from the POD sites that I have products on, but the options for ‘all over patterns’ in their garments was limited.
No problem, I like to make my clothes, and this was a good opportunity for me to make colourful and interesting summer clothes.
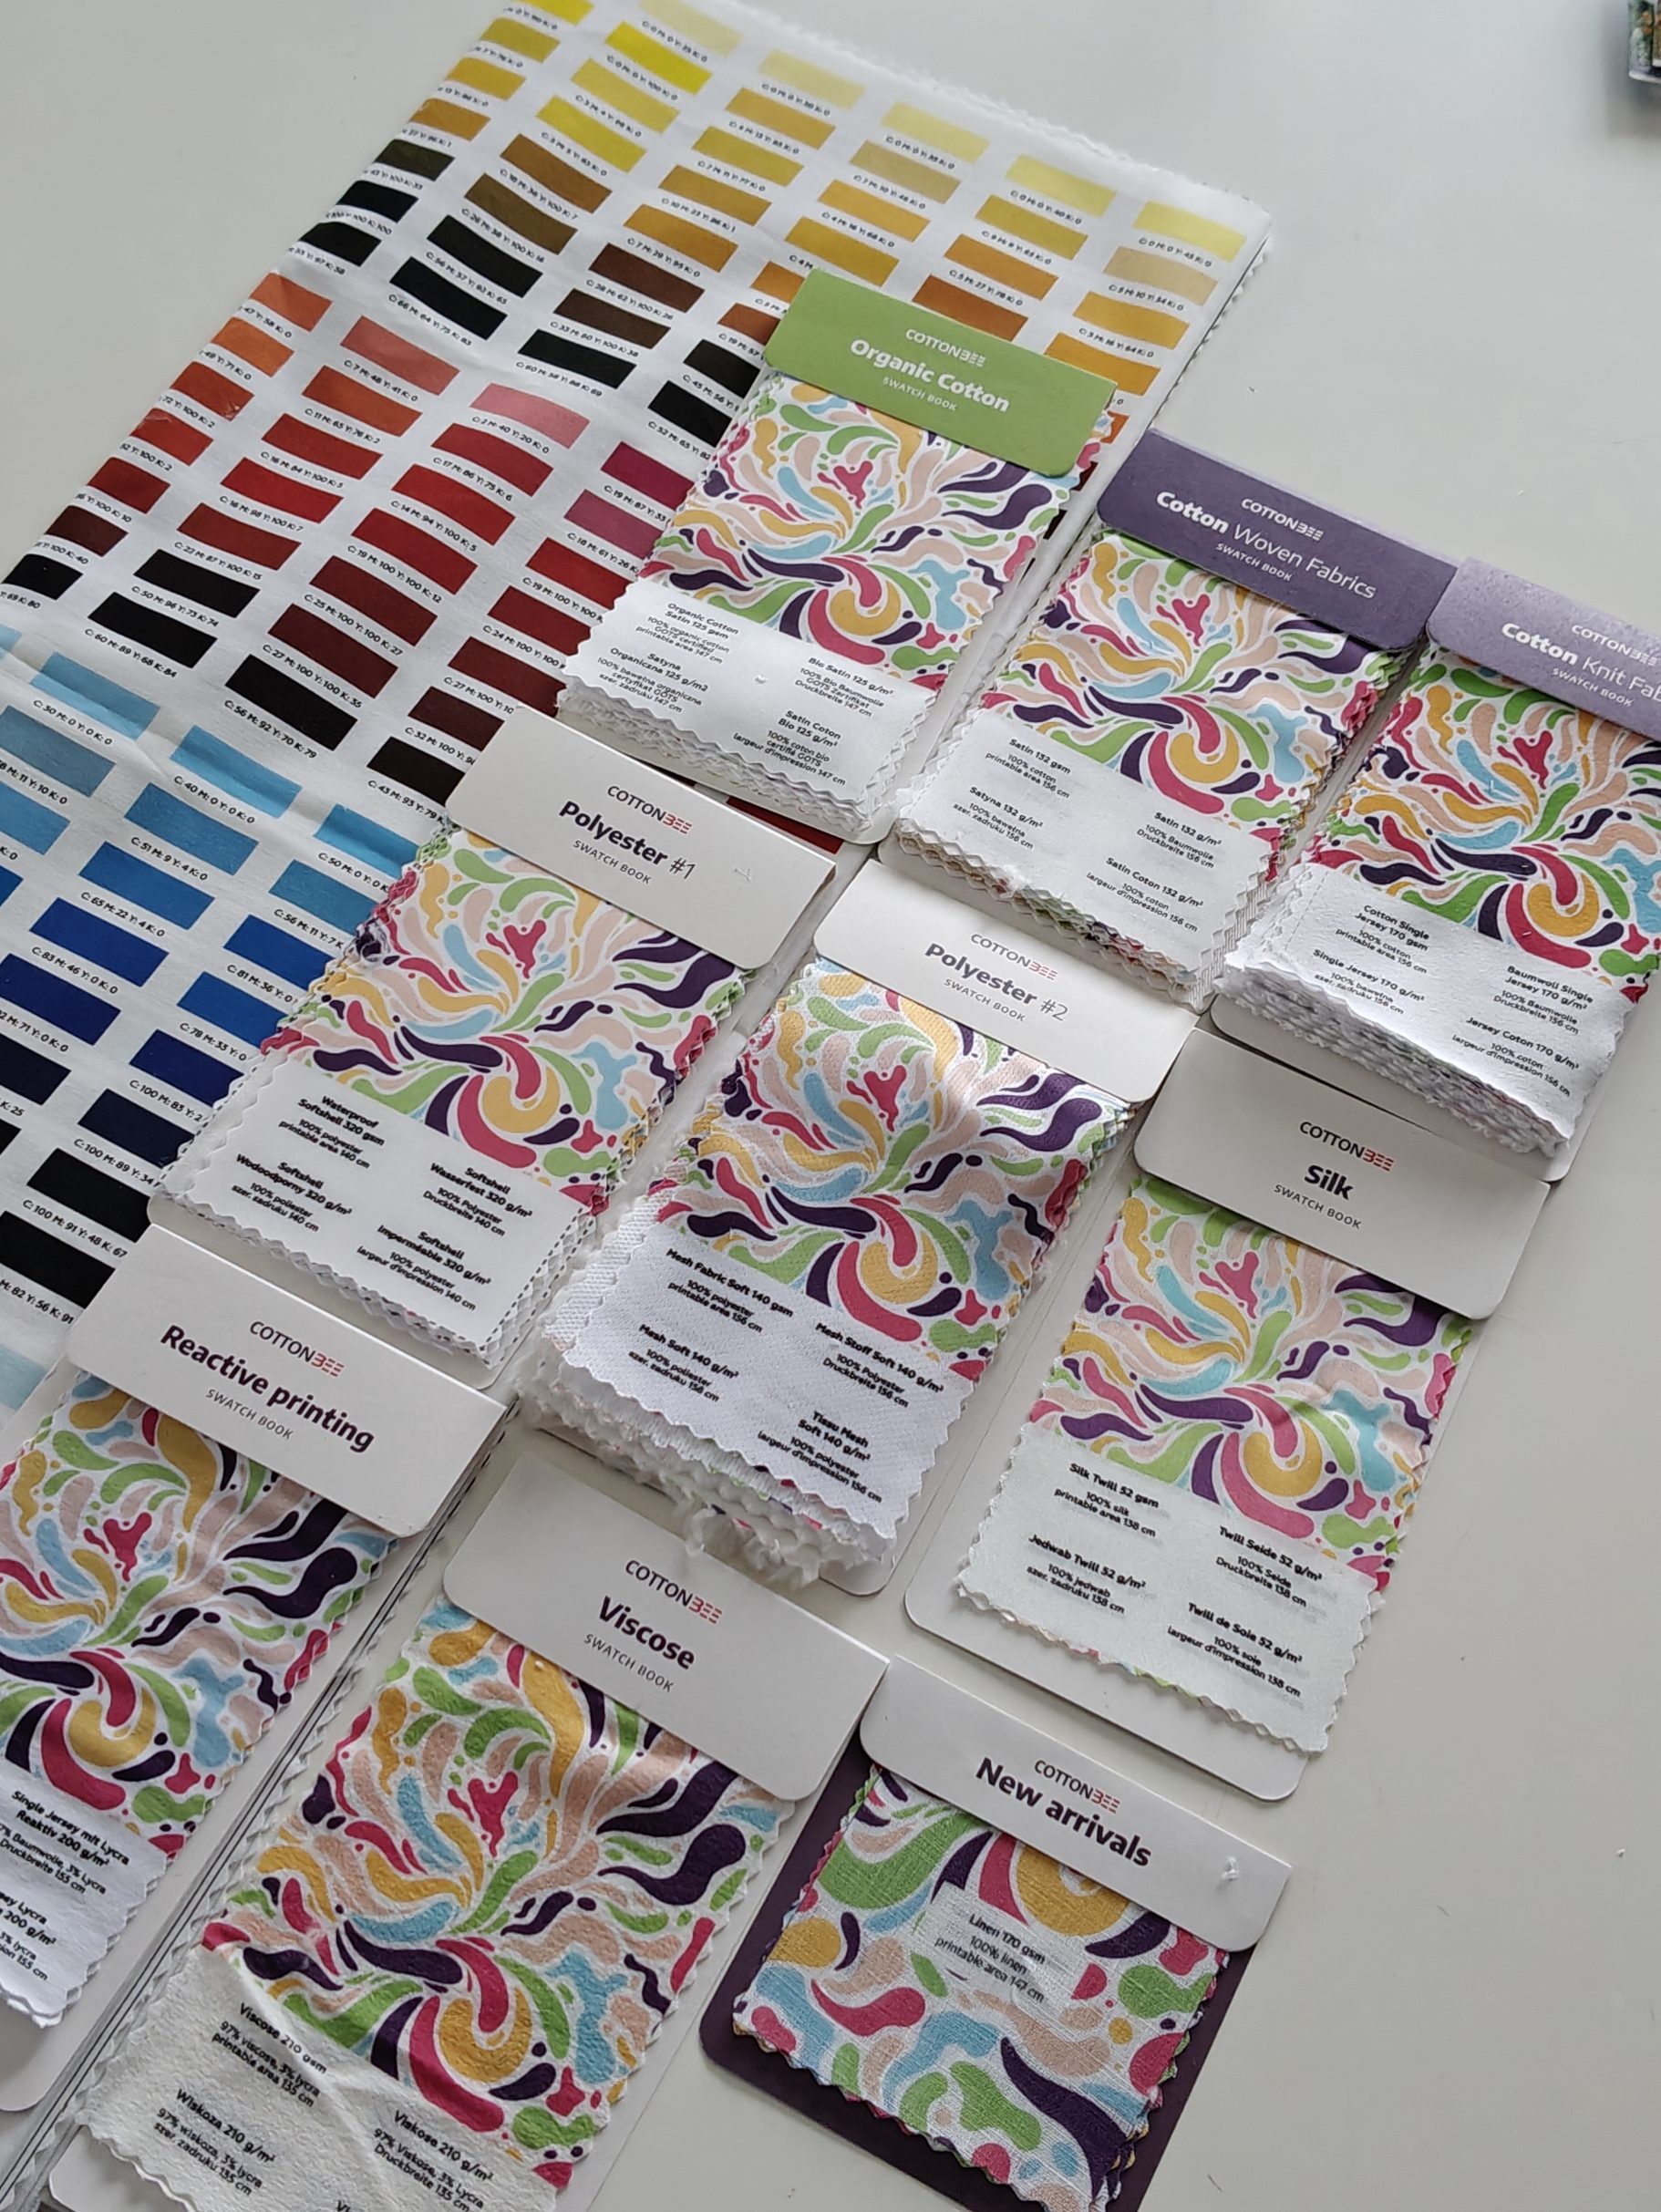
But there was bump on the road, my files were in RGB, and many textile printers use CMYK. I used the Photoshop’s convergence from RGB to CMYK, but I had my doubts of the accuracy of what I saw in my computer screen.
Eventually, I decided to order material samples and colour table from a textile producer I had decided to use. It was then straight forward to select the colours I wanted from the fabric colour table and then changing the colour codes in Photoshop to match. This was easy because I only had 2 to 3 colours in a print. The colours looked a bit different on my screen, but I decided to trust the colour codes to be correct.
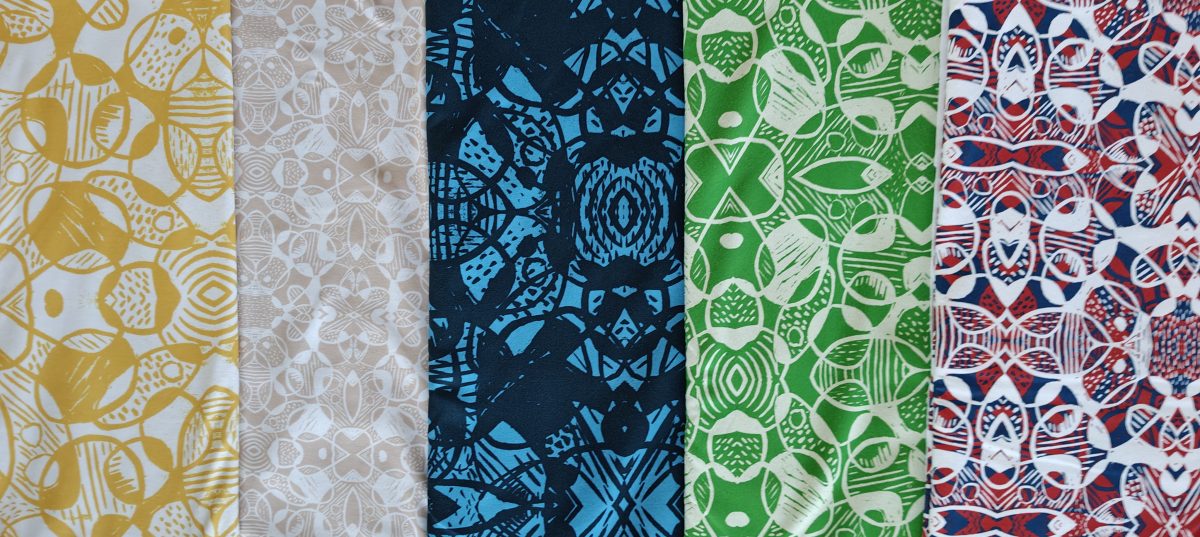
I ordered fabric with 5 different patterns/scaling and colours. Three of them cotton jersey knits with 8% Lycra (Single Jersey 200) and two others were 100% polyester (Polyester Single Jersey 220). I ordered 2m each. I had calculated that I would be able to make either one full length dress or two garments (t-shirt, shorts etc.) from each of them.
They came within the promised timeframe (4weeks), and the colours were just as what I had picked from the colour swatch.
Making the garments
First, I had to test how the fabrics change during washing. I cut from the jersey and polyester large enough pieces to make simple garments and threw them in the washing machine with my clothes and washed them in 60 degrees Celsius. (The cotton jersey was just fine although the manufacturer sited 40 degrees for it.) There was some shrinkage, but it was within what the manufacturer had stated. I compared the colours, and the washed fabrics were as bright as the non-washed.
I am a hobby sewist and working with knits is not the easiest thing to do. I am also a ‘get things done or it will not be finished’ kind of a person, so I did not stop to buy a double needle that would have made the sewing look a lot better. I also mostly made my own patterns based on my clothes that are comfortable. Material use efficiency is also a priority for me. So, any oddities in the garments are due to my experimental style of sewing.
I made one full length dress, 2 skirts, 1 wrap-blouse, 2 t-shirts, 2 knee high tights and 1 full length pants. There is still enough material still for a hoodie/long sleeved shirt (blue-dark blue jersey) and either for two no-sleeve shirts or one long sleeved shirt done with two different patterns.
The garments made with the green-light yellow jersey I ended up being used the most. The long pants are in use now that autumn has arrived. In general, all garments have been used several times.
Lessons learned from this experiment
- Creating patterns this way makes a very clear vertical and horizontal lines. This needs to be considered when placing the sewing patterns.
- Scaling up or down the patterns gives more variety and helps with the placing of the pattern. Larger prints seem more abstract on the garment.
- Buy proper needles and/or invest in a serger (overlocker) before the next sewing spree.
- Dark colours printed on white fabric really need a proper needle as wrong needles stretch the fabric and the base colour can show a bit.
- My lifestyle of digging in the garden and walking in the woods with my dog does not go well with white. Those garments are more for ‘special events’, like going to the grocery store once a week. 😊
What next
Next, I will be ordering fabrics to do some fall/winter clothes. I am currently learning on how to reduce the colour amounts in my more complex patterns. It is needed if I want to do the same colour picking that I did for the Goblins patterns. But I will also be using my printer to get an idea how big the colour differences are after using the Photoshop RBG/CMYK convergence. And this time I will be ordering small sample pieces of few of my multicolour prints before I order larger amounts.
Products with the Goblins patterns are available in Redbubble, Tee Public and in Spoonflower you can find also fabrics and wallpapers. Direct links to my stores are Where to Buy-page. There are only few patterns per site, so if you want something in different colour or scale. You can send me a request through the contact page.
If you are interested in licencing patterns, please check my licensing page and my Portfolio.